Many beginners discover that installing a Gold Furniture Handle transforms basic furniture into an elegant statement. Simple tools achieve impressive results. Clear instructions and practical tips ensure success, even for those with no prior experience. This easy upgrade brings a polished, stylish finish to any room.
Key Takeaways
- Use the right tools like a drill, measuring tape, and painter’s tape to protect furniture and ensure precise handle placement.
- Measure carefully and use templates or jigs to mark drill points accurately, preventing mistakes and achieving a professional look.
- Clean and maintain gold handles gently to keep their shine and prevent damage, using mild soap and protective coatings regularly.
Gold Furniture Handle: Tools and Materials Needed
Essential Tools for Installation
Every successful installation begins with the right tools. Experts recommend a basic toolkit that ensures accuracy and protects both the furniture and the new hardware. The following items appear most often in professional guides:
- Drill with adjustable speed settings
- Measuring tape for precise placement
- Screwdriver, preferably with interchangeable heads
- Pencil for marking drill points
- Level to guarantee straight alignment
- Masking tape or painter’s tape to prevent surface chipping
- Appropriate drill bits for the screw size
Tip: Place masking tape over the drilling area. This simple step helps prevent wood splintering and keeps the finish intact.
A well-prepared workspace also improves safety and efficiency. Lay out all tools within easy reach before starting the installation.
Materials Checklist
Selecting quality materials ensures the Gold Furniture Handle not only looks elegant but also lasts for years. Brass or gold-plated handles offer durability and timeless appeal. The following checklist covers all necessary materials:
- Gold or brass furniture handles
- Screws (usually included with handles)
- Extra screws in matching finish (for replacements)
- Soft cloth for cleaning surfaces before and after installation
Regular gentle cleaning with a soft cloth maintains the shine and prevents tarnish. Avoid harsh chemicals, as they can damage the gold finish. Periodically check and tighten screws to keep handles secure and functional.
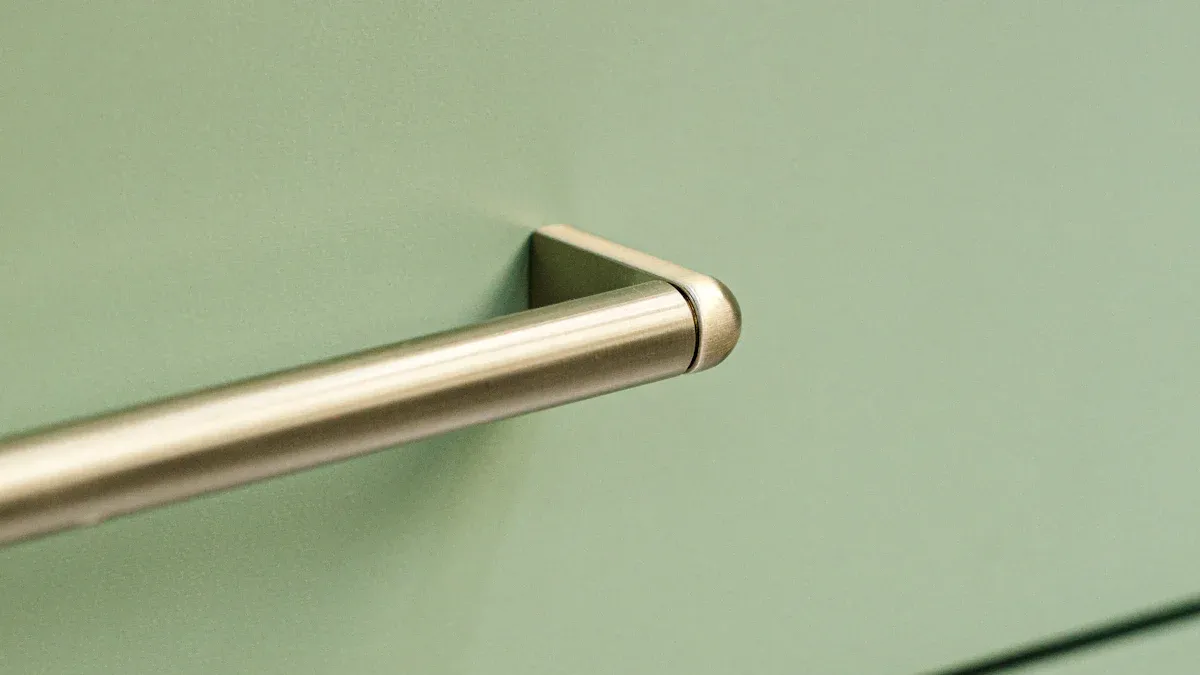
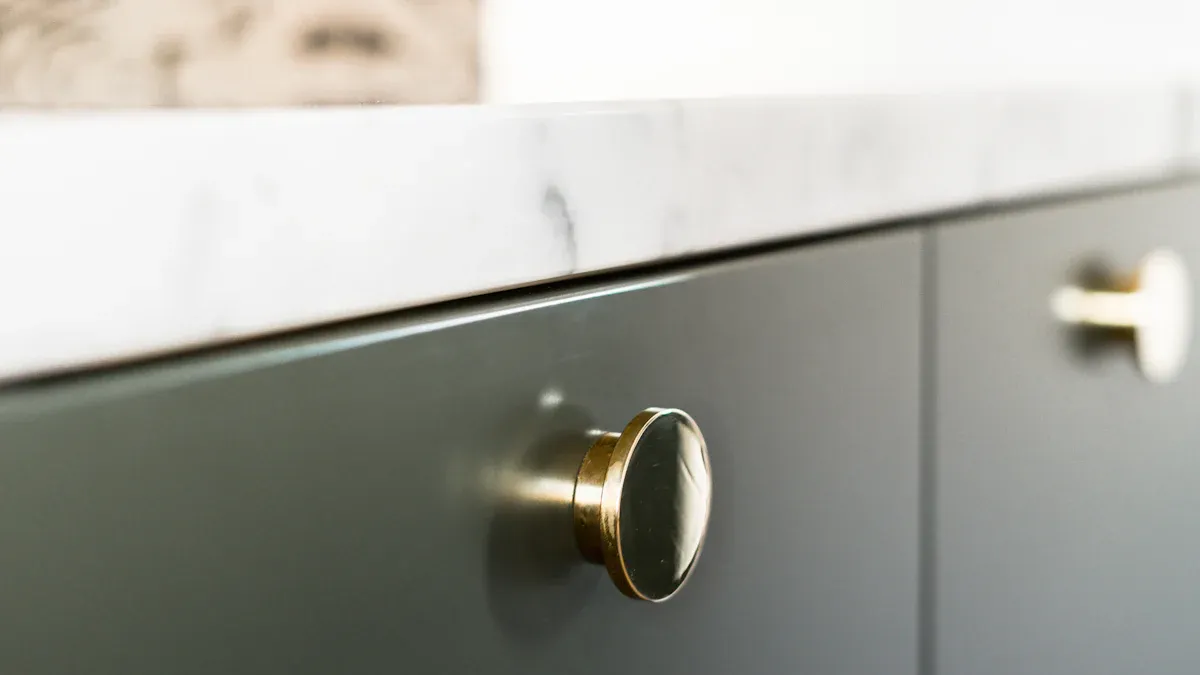
Choosing the Right Gold Furniture Handle
Selecting the Best Style and Size
Selecting the ideal Gold Furniture Handle involves more than just appearance. Current trends show that homeowners and designers value both function and style. The following points highlight popular preferences:
- Mixing hardware styles and finishes allows gold handles to stand out as unique accents.
- Larger handles serve as statement pieces, adding boldness to furniture.
- The ‘rule of 3’s’ suggests handles should measure about one-third the length of the drawer for visual balance.
- Consistent sizing, such as 128 mm handles, creates a traditional look and fits most upper cabinets and drawers.
- Longer handles (192 mm or 224 mm) suit larger drawers, providing a modern touch and preventing the hardware from appearing too small.
- Using up to three different handle sizes introduces variation without overwhelming the design.
- Personal preference and the flow of the space matter more than strict rules.
- Trying samples at home helps ensure satisfaction before final installation.
Tip: Always test handle samples on your furniture before making a final decision. This step helps confirm both comfort and style.
Matching Handles to Your Furniture’s Design
Gold handles adapt to a wide range of furniture styles. Designers often use them to enhance vintage, contemporary, transitional, and rustic pieces. For example, vintage cabinets paired with gold handles and antique accessories create a timeless look. Contemporary kitchens benefit from the sophisticated contrast gold provides. Transitional spaces blend traditional and modern elements, using gold hardware to bridge the gap. Rustic designs gain warmth and elegance from gold accents. Visual guides from design resources show how gold handles coordinate with various finishes and accessories, making them a versatile choice for any room.
Preparing for Gold Furniture Handle Installation
Measuring and Marking Placement Accurately
Accurate measurement and marking form the foundation of a professional hardware installation. Experts recommend starting by measuring the width and height of each drawer or cabinet face. This process helps locate the exact center point, which serves as the reference for handle placement. For a Gold Furniture Handle, precise alignment ensures both visual appeal and functional use.
Installers measure the distance between the screw holes on the handle, then divide this spacing evenly from the center mark. Marking these points with a pencil creates clear guides for drilling. Technical guides suggest using a 3/16" (5mm) drill bit for most standard hardware screws. Consistent measurement and marking reduce the risk of misaligned handles, which can detract from the overall appearance.
Accuracy and precision play distinct roles in this process. Accuracy refers to how close the measurement comes to the true value, while precision describes the repeatability of the measurement. Random and systematic errors can affect both. Calibrated tools and careful technique help minimize these errors, leading to reliable results. Installers often double-check measurements before drilling to avoid costly mistakes.
Tip: Mark the drilling points with a pencil and verify alignment with a level before proceeding. This extra step prevents uneven handles and saves time on corrections.
Using Templates and Jigs for Consistency
Templates and jigs provide a practical solution for achieving uniform handle placement across multiple drawers or doors. Many professionals rely on a cabinet hardware jig, which offers calibration to a precision of .005” square. This level of accuracy ensures that each handle sits at the same height and distance from the edge, creating a cohesive look throughout the furniture piece.
Templates, often made from cardboard or plastic, allow users to replicate hole positions quickly. By aligning the template with the edge of the drawer or door, installers can mark drill points without repeated measurements. Jigs, which are adjustable tools, further streamline the process by holding the drill bit steady and guiding it to the correct location.
Nancy Reyner, a recognized expert in gold leaf application, emphasizes the importance of proper surface preparation before installing decorative hardware. She recommends sealing the surface with a commercial sealer, such as solvent-based polyurethane, to protect both the finish and the gold leaf from tarnishing. Testing new sealers on sample pieces prevents accidental damage to valuable furniture.
Note: Always test templates and jigs on a scrap piece or an inconspicuous area first. This practice ensures the tool produces the desired result and avoids mistakes on visible surfaces.
Careful preparation, accurate measurement, and the use of reliable tools set the stage for a flawless Gold Furniture Handle installation. These steps not only enhance the final appearance but also extend the life and durability of the hardware.
Drilling Holes for Gold Furniture Handle

Selecting the Correct Drill Bit and Using Painter’s Tape
Selecting the right drill bit ensures a clean, professional installation. Experts recommend starting with a pilot hole that is slightly smaller than the anchor screw. This approach prevents cracking and allows the screw to grip securely. Blue painter’s tape, such as 3M Scotch Performance Masking Tape, offers strong adhesion without damaging surfaces. Installers place painter’s tape over the drilling area to protect delicate finishes from chipping. This tape also serves as a guide for marking layouts, making it easier to maintain accuracy. The elasticity and clean removal of painter’s tape make it ideal for both marking and surface protection. Professionals value this step for its ability to safeguard furniture, especially when working with a Gold Furniture Handle on high-end pieces.
Tip: Always remove painter’s tape slowly after drilling to avoid lifting any finish or veneer.
Drilling Pilot Holes Safely
Safe drilling practices lead to precise and durable hardware installation. Woodworkers emphasize the importance of slow drill speeds when tapping threads. This technique reduces the risk of splintering and ensures the pilot hole remains aligned and plumb. Installers often use machine screws for a better fit and easier adjustment. Tapping holes by hand with a wrench after drilling produces high-quality threads and prevents the hole from widening. The mantra "measure twice, drill once" guides professionals to double-check all markings before drilling. Following a specific sequence—starting from the top anchor and moving downward—helps maintain alignment and prevents twisting. These best practices result in improved stability and a flawless finish for any Gold Furniture Handle project.
Attaching the Gold Furniture Handle
Securing Handles Firmly and Evenly
After drilling the pilot holes, installers begin attaching the handles. They insert the screws through the back of the drawer or cabinet face, guiding them into the threaded holes of the handle. Using a screwdriver with the correct head, they tighten each screw until the handle sits flush against the surface. Over-tightening can damage both the hardware and the furniture, so installers apply steady, moderate pressure.
To achieve even pressure and a secure fit, professionals often alternate tightening each screw in small increments. This method prevents the handle from shifting during installation. For larger handles, installers may use a level to confirm that the handle remains straight as they tighten the screws. Some professionals recommend using a soft cloth between the handle and the furniture surface to protect delicate finishes during this process.
Tip: If the handle feels loose after tightening, check for debris in the screw holes or consider using slightly longer screws for a firmer grip.
Checking Alignment and Making Adjustments
Precise alignment ensures that the Gold Furniture Handle looks professional and functions smoothly. Installers check the handle’s position visually and with a level. If the handle appears misaligned, they loosen the screws slightly and adjust the handle before retightening. This process allows for minor corrections without damaging the furniture.
Professionals use several strategies and tools to maintain alignment:
- Alignment clamps hold the handle in place during installation, preventing movement and ensuring a consistent fit.
- Calibration techniques, such as zero calibration and linearity calibration, help maintain accuracy when using jigs or templates.
- Periodic checks with a level or straightedge confirm that each handle matches the others in height and orientation.
In high-precision environments, experts address challenges like vibration or thermal drift by using damping systems or temperature compensation. Automated alignment algorithms can further reduce human error, but for most home projects, careful manual adjustment and regular verification suffice.
Note: Regularly check the alignment of all handles before completing the installation. Small adjustments at this stage prevent uneven hardware and improve the overall appearance of the furniture.
By following these steps, installers ensure that each handle sits firmly, evenly, and in perfect alignment. This attention to detail transforms ordinary furniture into a polished, elegant piece.
Maintenance and Care for Gold Furniture Handle
Cleaning and Preventing Tarnish
Proper cleaning and tarnish prevention keep gold hardware looking new. Experts recommend several steps for maintaining a Gold Furniture Handle:
- Clean hardware gently with a mild soap and water solution using a soft cloth or sponge.
- Avoid harsh chemical cleaners that can damage gold plating.
- Remove tarnish with a jewelry polishing cloth or a metal polishing paste, testing on a hidden area first.
- Use natural remedies like baking soda and aluminum foil paste with caution, always testing before full application.
- Seal the finish with a protective topcoat such as clear nail polish or a metal lacquer sealant.
- Perform routine maintenance by cleaning regularly and reapplying protective coatings.
- Store hardware properly when not in use to reduce exposure to moisture.
A market analysis highlights the effectiveness of liquid metal polish products. These products clean, polish, and protect gold surfaces in one step. Many consumers prefer these solutions for their ease of use and ability to maintain shine and prevent tarnish. Regular cleaning with soft cloths and the use of protective coatings help extend the life of gold hardware.
| Method | Advantages | Disadvantages |
|---|---|---|
| Proper Storage | Easy, reduces moisture exposure | Needs consistency, less effective in humidity |
| Regular Cleaning | Maintains appearance, uses mild solutions | Requires ongoing effort, risk if done improperly |
| Protective Coatings | Prolongs shine, effective barrier | Needs reapplication, requires careful use |
Protecting Against Scratches and Wear
Gold hardware remains vulnerable to scratches and daily wear. Users should handle hardware with clean hands to avoid transferring oils and dirt. Keeping hardware away from harsh chemicals, perfumes, and sprays helps preserve protective coatings. Regularly polish with a soft cloth or a jewelry polishing cloth to remove dirt and maintain shine. Applying a clear protective coating, such as a metal lacquer, adds a barrier against scratches. Storing hardware in dry environments, possibly with moisture-absorbing packets, further protects the finish. Routine care ensures that each Gold Furniture Handle retains its elegant appearance for years.
Installing a Gold Furniture Handle offers a straightforward way to refresh any furniture piece. Beginners gain confidence by following each step. The right tools and careful preparation ensure a polished result. Homeowners can enjoy a stylish, updated look that elevates their living space.
FAQ
How can someone fix a loose gold furniture handle?
Tighten the screws with a screwdriver. If the handle remains loose, replace the screws with slightly longer ones for a more secure fit.
What should a person do if the gold finish starts to tarnish?
Clean the handle with a soft cloth and mild soap. Use a jewelry polishing cloth for stubborn tarnish. Avoid abrasive cleaners to protect the finish.
Can gold handles be installed on any type of furniture?
Yes, gold handles work on wood, MDF, and laminate furniture. Always check the thickness of the surface to ensure proper screw length and secure attachment.
Post time: Jul-01-2025