
Proper installation of door accessories significantly enhances both functionality and aesthetics. A survey of industry experts revealed that 96% value durability and appearance as key priorities for homeowners. Doors, alongside windows, play a pivotal role in elevating a home’s visual appeal while ensuring protection. With the right techniques and tools, anyone can achieve professional-quality results.
Key Takeaways
- Pick the correct tools for the job. Simple tools like screwdrivers and hammers are important, but special tools help with precision and safety.
- Measure carefully and double-check. Always check measurements twice before drilling to prevent errors and keep things aligned.
- Choose accessories that fit well. Check details and match materials to improve how they work and look.
Tools and Materials for Installing Door Accessories
Essential Tools for Installation
Installing door accessories requires a variety of tools to ensure precision and efficiency. Basic tools like screwdrivers, hammers, and pliers are indispensable for most projects. Specialized tools, such as digital measuring devices and electrical testing equipment, enhance accuracy and safety. For more complex installations, professional-grade tools provide the durability and functionality needed to handle intricate tasks. Maintenance tools, including hinge pin removal tools and lubricant applicators, are essential for long-term upkeep. Smart tech tools, such as programmers and network connectivity testers, are increasingly important for modern, tech-enabled door accessories.
| Tool Category | Essential Tools |
|---|---|
| Basic Tools | Screwdrivers, Hammers, Pliers |
| Specialized Tools | Digital measuring devices, Electrical testing equipment |
| Professional-grade Tools | High-quality tools designed for complex projects and safety during installation |
| Maintenance Tools | Lubricant application tools, Hinge pin removal tools, Key gauge tools, Door closer adjustment tools |
| Smart Tech Tools | Programmers, Network connectivity testers, Battery installation equipment |

Recommended Materials for Durability
Durable materials ensure that door accessories withstand daily wear and tear. ASTM standards guide the evaluation of materials used in construction, ensuring reliability and safety. Accelerated testing methods simulate long-term use, identifying potential weaknesses in design or material. These tests are critical for maintaining the functionality and safety of doors in both residential and commercial settings.
| Aspect | Description |
|---|---|
| Purpose | Durability testing replicates wear and tear to identify design errors and material weaknesses. |
| Application | Relevant across various industries, including construction, to ensure material reliability. |
| Standards | ASTM’s building standards guide the evaluation and testing of materials used in construction. |
| Testing Methods | Includes accelerated tests that provide critical information in a short timeframe. |
| Importance for Safety | Ensures doors maintain functionality and safety during everyday use and emergencies. |
Optional Tools for Precision and Ease
Optional tools can simplify the installation process and improve precision. A relational database can streamline hardware specifications by providing quick access to product comparisons. Word processing apps and product data sheets are helpful for organizing and specifying door hardware. These tools allow users to categorize and link items effectively, ensuring a seamless installation process.
- Relational databases for product comparisons
- Word processing apps for hardware specifications
- Product data sheets for detailed information
Tip: Investing in optional tools can save time and reduce errors during installation.
Preparing for Door Accessories Installation
Measuring and Marking Accurately
Accurate measurements form the foundation of a successful door accessory installation. Using tools like a measuring tape and a square ensures precision when marking positions for hinges, handles, or locks. A reference ruler can verify the accuracy of tools like a tablesaw rip-fence scale, while a simple test with a square tool confirms its reliability. Consistency improves when measurements are taken from designated reference edges and faces.
To avoid errors, measure the height, width, and thickness of the door and any glass panels involved. Marking these measurements clearly with a pencil or chalk helps maintain alignment during installation. Professionals recommend double-checking all measurements before proceeding to drilling or cutting.
Tip: Always calibrate your tools before use to ensure they provide accurate readings.
Ensuring Compatibility of Accessories
Selecting compatible door accessories is critical for both functionality and durability. Verify the specifications of existing components, such as hinge type, size, and mounting hole patterns. For new installations, consider the load-bearing capacity and corrosion resistance of the hardware. The overlay of cabinet doors also influences hinge selection, requiring specific types for full overlay, partial overlay, or inset doors.
When purchasing new accessories, sourcing from reputable retailers ensures quality and compatibility. Matching the materials and finishes of the accessories with the door enhances both aesthetics and performance.
Note: Incompatible hardware can lead to operational issues or premature wear, so thorough checks are essential.
Setting Up a Safe and Clean Workspace
A well-organized workspace minimizes risks and improves efficiency during installation. Proper lighting ensures visibility, reducing the likelihood of mistakes. Good ventilation removes dust and fumes, creating a healthier environment. Keeping the area clean prevents accidents and maintains the performance of tools.
Safety protocols, such as storing tools securely and using clear signage, further enhance the workspace. Emergency preparedness, including having a first aid kit and emergency contacts readily available, is equally important. According to the Health and Safety Executives (HSE), implementing these measures significantly reduces work-related injuries.
Reminder: Always wear safety gear, such as gloves and goggles, to protect yourself during the installation process.
Step-by-Step Guide to Installing Door Accessories

Installing Door Handles and Knobs
Installing door handles and knobs requires precision to ensure proper functionality and alignment. Begin by selecting a handle or knob that matches the door’s thickness and design. Use a template to mark the positions for the holes on the door. Drill the necessary holes carefully, ensuring they align with the hardware specifications.
Once the holes are prepared, insert the latch mechanism into the edge of the door and secure it with screws. Attach the exterior and interior parts of the handle or knob, aligning them through the drilled holes. Tighten the screws to secure the hardware firmly. Finally, test the handle or knob by turning it to confirm smooth operation.
Tip: Use a level to ensure the handle or knob is perfectly horizontal for a polished look.
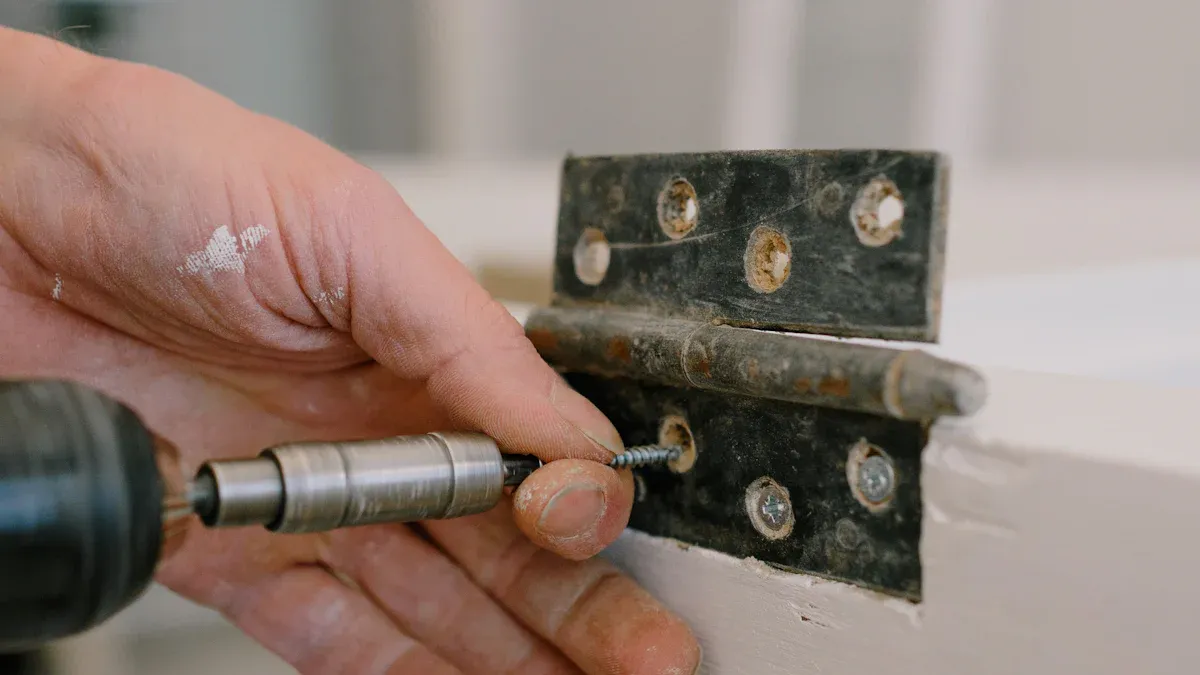
Securing Hinges Properly
Properly securing hinges is essential for the door’s stability and smooth movement. Follow these steps for a professional installation:
- Choose hinges that match the door’s weight, size, and material.
- Measure and mark the hinge placement on both the door and the frame, ensuring alignment.
- Attach the hinges to the door using screws, checking for level alignment.
- Secure the hinges to the door frame, ensuring they are flush with the surface.
- Carefully hang the door by aligning it with the hinges and lowering it into place.
- Test the door by opening and closing it to ensure smooth operation.
- Make any necessary adjustments to achieve proper alignment.
Note: Using high-quality hinges enhances the durability and functionality of door accessories.
Adding or Replacing Door Locks
Adding or replacing door locks improves security and functionality. Start by evaluating the current lock to determine if replacement is necessary. Gather the required tools, including a drill, screwdriver, and chisel. Follow these steps for a seamless installation:
- Position the lock template on the door and mark the drilling points.
- Drill the door face and edge to accommodate the lock assembly.
- Chisel the door edge and jamb to ensure a flush fit for the hardware.
- Install the latch mechanism and secure it with screws.
- Attach the lock cylinder and interior components, ensuring proper alignment.
- Tighten all screws and test the lock for smooth operation.
Tip: Regularly inspect and maintain locks to ensure they remain functional and secure.
Installing Decorative Accessories
Decorative accessories, such as door knockers, kick plates, or nameplates, add a touch of elegance to any door. Begin by selecting accessories that complement the door’s style and finish. Mark the desired positions for the accessories, ensuring they are level and centered.
Drill pilot holes for screws or use adhesive strips, depending on the accessory type. Attach the decorative piece securely, taking care not to damage the door’s surface. Clean and polish the installed accessory to enhance its appearance.
Reminder: Decorative accessories should not interfere with the door’s primary functions, such as opening, closing, or locking.
Troubleshooting Door Accessories Installation Issues
Fixing Misaligned Holes or Screws
Misaligned holes or screws can compromise the stability and appearance of door accessories. To address this issue, start by identifying the misalignment. Use a pencil to mark the correct positions for the screws or holes. If the existing holes are slightly off, widen them using a drill bit that matches the screw size. For larger misalignments, fill the incorrect holes with wood filler or dowels and allow them to dry completely. Once the filler hardens, sand the area smooth and drill new holes in the correct positions.
When reinstalling screws, ensure they are driven straight into the material to prevent further misalignment. A handheld screwdriver often provides better control than a power drill for this step. For added stability, consider using longer screws or wall anchors, especially for heavier accessories.
Tip: Always double-check measurements and alignment before drilling to avoid repeated errors.
Resolving Loose or Wobbly Accessories
Loose or wobbly door accessories not only look unprofessional but can also affect functionality. Begin by tightening all screws with the appropriate tool, such as a screwdriver or Allen wrench. If the screws fail to hold, inspect the holes for wear or damage. Stripped screw holes can be repaired by inserting wooden toothpicks coated with wood glue into the hole. Once the glue dries, trim the excess toothpick material and reinstall the screw.
For accessories mounted on hollow-core doors, use specialized anchors designed for this type of material. These anchors expand inside the door, providing a secure hold. If the accessory remains unstable, consider replacing the screws with larger ones or using adhesive strips for additional support.
Reminder: Regularly check and tighten screws to maintain the stability of door accessories over time.
Overcoming Drilling or Tightening Challenges
Drilling or tightening challenges often arise due to hard materials or limited workspace. To drill into tough materials like metal or hardwood, use a high-speed steel (HSS) drill bit and apply steady pressure. Lubricating the drill bit with cutting oil can reduce friction and prevent overheating. For precise drilling, mark the spot with a center punch to keep the drill bit from slipping.
When tightening screws in confined spaces, use a stubby screwdriver or a flexible shaft attachment for better access. If a screw becomes stuck, apply a penetrating lubricant and wait a few minutes before attempting to loosen it. For stubborn screws, use a screw extractor tool to remove them without damaging the surrounding material.
Note: Always wear safety goggles when drilling to protect your eyes from debris.
Repairing Cosmetic Damage
Cosmetic damage, such as dents, scratches, or chipped paint, can detract from the overall appearance of door accessories. Address these issues using the following steps:
- Fixing Dents and Gouges: Fill small dents and gouges with a two-part wood filler to prevent moisture intrusion.
- Removing and Filling Wood Rot: For areas affected by water damage, remove the rotted wood and restore the surface with a two-part epoxy wood filler.
- Sanding and Finishing: After applying the filler, sand the area until smooth. Prime and paint the repaired section to match the door’s finish.
For metal accessories, use fine-grit sandpaper to remove scratches and apply a metal polish for a restored shine. If the damage is extensive, consider replacing the accessory to maintain the door’s aesthetic appeal.
Pro Tip: Regular cleaning and maintenance can prevent cosmetic damage and extend the lifespan of door accessories.
Pro Tips for Installing Door Accessories Like a Pro
Double-Check Measurements Before Drilling
Accurate measurements are crucial for a flawless installation of door accessories. Before drilling, always verify the measurements to avoid costly mistakes. For instance:
- Measure 41 inches (100 cm) from the floor to determine the ideal height for a door handle.
- Attach the template from the door handle kit to the door for precise marking.
Double-checking ensures that the hardware aligns perfectly with the door’s design and functionality. Professionals recommend using a pencil for marking, as it allows for easy adjustments if errors occur. This simple step can save time and prevent unnecessary damage to the door.
Tip: Always measure twice to drill once. This practice minimizes errors and ensures a professional finish.
Use a Level for Perfect Alignment
A level is an indispensable tool for achieving perfect alignment during installation. It ensures that doors and their hardware, such as hinges and handles, remain horizontal and balanced. After attaching a hinge, use a level to confirm that it is perfectly aligned. Misaligned hinges can cause the door to hang improperly, leading to operational issues.
For decorative accessories, such as kick plates or nameplates, a level guarantees a polished and symmetrical appearance. Incorporating this tool into the process enhances both the functionality and aesthetics of the installation.
Note: Regularly check the calibration of your level to maintain its accuracy.
Apply Lubricant for Smooth Operation
Lubrication plays a vital role in maintaining the functionality of door accessories. Technicians recommend applying white lithium grease to locks and latches and using WD-40 for hinges. Lubricating pulleys, sheaves, and arm bars ensures smooth operation and prevents wear. Preventive maintenance schedules suggest lubricating all moving parts twice a year, ideally before winter and summer.
Replacing old or dirty lubricants is equally important for optimal performance. Regular lubrication not only extends the lifespan of the hardware but also enhances the user experience by reducing friction and noise.
Pro Tip: Keep a small maintenance kit with lubricants and applicators for quick touch-ups.
Clean and Polish Accessories for a Professional Finish
Cleaning and polishing door accessories elevate their appearance and contribute to a professional finish. Use a soft cloth and a non-abrasive cleaner to remove dust and fingerprints. For metal accessories, apply a specialized polish to restore their shine and protect against corrosion.
Regular cleaning also prevents the buildup of grime, which can affect the functionality of moving parts. A well-maintained door with polished accessories creates a lasting impression and reflects attention to detail.
Reminder: Avoid harsh chemicals that may damage the finish of the accessories.
Proper preparation, precise measurements, and effective troubleshooting ensure successful door accessory installation. Applying these tips allows readers to achieve professional-quality results while saving time and effort.
Reminder: Every DIY project is an opportunity to showcase creativity and skill. Taking pride in the finished product builds confidence and inspires future accomplishments.
FAQ
What is the best way to ensure accurate drilling for door accessories?
Using a template or guide ensures precise drilling. Mark positions clearly with a pencil and double-check measurements before proceeding. This minimizes errors and ensures proper alignment.
How can someone fix stripped screw holes in a door?
Fill the hole with wooden toothpicks coated in wood glue. Let it dry, trim excess material, and reinstall the screw. This method restores stability effectively.
Are there specific tools recommended for hollow-core door installations?
Yes, specialized anchors designed for hollow-core doors provide a secure hold. These anchors expand inside the door, ensuring stability for mounted accessories.
Post time: May-28-2025